Where To See The Aurora Borealis In 2026: Forecast, Spots, And Travel Tips
Author:Andy
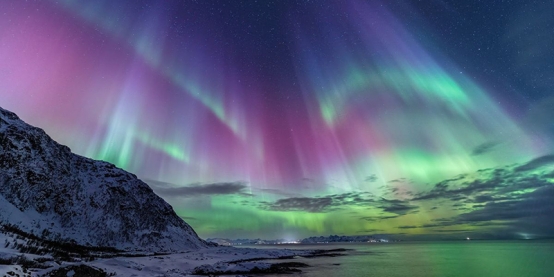
We’re entering a particularly active phase of the solar cycle, and for aurora chasers, 2026–2027 promises some of the most impressive displays in years. Frequent solar flares and coronal mass ejections are sending charged particles toward Earth, creating brighter, faster-moving auroras that can stretch far beyond the usual polar horizon.
This guide focuses on how aurora actually behaves in real conditions, which data to track, and how to position yourself to maximize your chances of witnessing—and photographing—these spectacular northern lights.
What to Expect From Aurora Activity in 2026
Aurora activity in 2026 is not about a single “peak moment.” Instead, it reflects a longer, more forgiving active phase of the solar cycle. Strong aurora displays tend to appear repeatedly over an extended period, rather than all at once.
- Higher Success Rates for Short Trips
In 2026, aurora activity is expected to remain consistently elevated. Travelers staying just a few nights have a better chance of seeing visible aurora, rather than needing a week-long stay.
- More Dynamic Displays, Not Just Faint Glows
One of the most common disappointments for first-time viewers is seeing only a dim, static green arc. In 2026, movement, structure, and brightness changes are more common—curtains, waves, and fast motion are easier to spot with the naked eye.
- Occasional Surprises at Lower Latitudes
While Arctic regions remain the most reliable locations, 2026 increases the chances of aurora appearing slightly farther south than usual. This can benefit travelers who prefer accessible destinations over remote expeditions.
How Aurora Watching Is Changing
Rather than focusing on a single index or headline forecast, experienced observers are paying attention to how long activity is expected to last. Sustained periods of activity often produce better viewing experiences than short-lived spikes.
For travelers, this means:
Flexible evenings matter more than chasing one “perfect” night
Multi-night forecasts are more useful than single-hour predictions
Destinations that allow last-minute plan adjustments offer a clear advantage
What This Means for You
You don’t need technical knowledge to plan a successful trip
Short stays of 3–5 nights are more viable than in quieter years
The chance of seeing vivid, moving aurora is higher
First-time viewers are more likely to walk away satisfied
If you’ve been waiting for a year when aurora travel feels less like a gamble and more like a calculated experience, 2026 stands out as a strong opportunity.
Alaska’s Interior (Fairbanks to Coldfoot)
Alaska’s interior remains one of the most reliable aurora regions thanks to its dry, continental climate. Mountain ranges block much of the coastal cloud cover, which means clear skies often coincide with active aurora.
Fairbanks is a convenient base, but during peak aurora season it suffers from light pollution, tour congestion, and cloud traps. Driving north along the Dalton Highway dramatically improves viewing conditions.
Route: Dalton Highway
Vehicle: A gravel-capable 4×4 is mandatory. Confirm in writing that your rental allows Dalton Highway travel; many do not.
Target latitude: Coldfoot Camp (67.25°N)
Coldfoot sits almost directly beneath the auroral oval. Activity that looks faint or unremarkable near Fairbanks often becomes full-sky, overhead displays this far north.
Timing and Daily Planning
Best viewing window: 10:30 PM–2:30 AM local time
Cloud strategy: If Fairbanks is overcast, check sky conditions north of the Yukon River—clear breaks often begin there.
Stay flexible: Plan rest during daylight hours so you can stay alert late at night.
Where to Stay
Borealis Basecamp (north of Fairbanks):
Best for passive viewing during extreme cold. Heated domes allow rest without constant outdoor exposure. Premium pricing, but weather-proof.
Slate Creek Inn (Coldfoot):
Spartan but effective. Excellent darkness, minimal light pollution, and quick access to open sky. Bring earplugs—trucks pass through at night.
Clothing and Gear Essentials
Layering beats bulk: merino base, insulated mid-layer, windproof shell
Insulated boots rated at –40°F or lower
Chemical hand and toe warmers (bring more than you think)
Red-light headlamp to preserve night vision
Tripod-rated for wind and deep cold (carbon fiber preferred)
Budget Snapshot (Interior Alaska)
Vehicle rental (7 days): ~$1,200
Accommodation: ~$2,000–$5,000
Fuel: ~$300
Northern Norway (Tromsø & Senja)
Northern Norway offers a different advantage: milder temperatures combined with dramatic coastal scenery. Warm ocean currents keep winter conditions comparatively manageable, making this region appealing to travelers sensitive to extreme cold.
Tromsø functions as a logistical hub, with easy access to transport, guides, and forecasting support. It is a practical starting point rather than the final destination.
Driving south to Senja Island significantly improves both darkness and landscape quality.
Top Spots & Why They Work
Tungeneset: Coastal cliffs with panoramic views. Reflections on the calm water in front of the cliffs often double the aurora in photos.
Dragon’s Back ridgelines: Dramatic jagged peaks that rise sharply from the fjord. These silhouettes frame the aurora beautifully, especially during moderate to strong activity.
Ersfjord & Segla area: Slightly more remote, but ideal for photographers who want foregrounds free from even minor light pollution.
Photography & Viewing Tips
Twilight Advantage: During stronger aurora displays, the sky rarely turns completely black. Early evening twilight can produce deep blues and purples, creating richer color separation in photos.
Reflections: Look for still water or fjords to capture mirrored aurora effects.
Composition: Combine mountains and water; Senja’s topography makes foreground storytelling easier than flat Arctic plains.
Gear: Wide-angle lens (14–24mm), tripod rated for coastal winds, remote shutter, and extra batteries (cold drains them fast).
Where to Stay
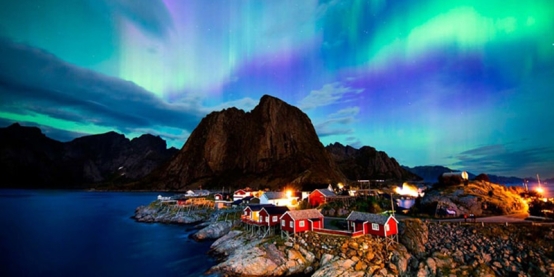
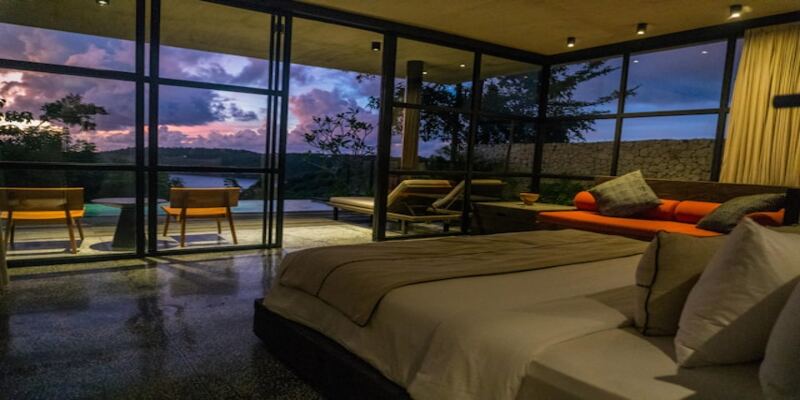
Hamn i Senja: Converted fishing village with glass-front apartments and panoramic water views. Perfect for passive indoor viewing during extreme cold or after long nights outside.
Tromsø Ice Domes: Unique and photogenic, but best as a one-night experience rather than a base. Ideal if you want a night immersed in ice architecture and short aurora walks.
Self-catering cabins: Several private cabins are available closer to remote fjords, giving maximum darkness and flexibility for chasing the aurora across different locations.
Budget Snapshot (Northern Norway)
Vehicle rental (7 days): ~$700–$1,000
Accommodation: ~$2,500–$4,000
Fuel & ferries: ~$300–$500
Meals & incidentals: ~$500–$700
Total approximate: $4,000–$6,000
Iceland (Reykjavík & North Coast)
Iceland offers a unique combination of accessibility, dramatic landscapes, and reliable aurora viewing, especially during winter months. Compared to interior Alaska or Northern Norway, Iceland’s shorter distances and extensive road network make it possible to combine aurora watching with other winter activities.
Reykjavík as a Base
Reykjavík serves as a convenient hub for travel, accommodations, and guided tours. While the city itself suffers from light pollution, short drives (1–2 hours) to nearby rural areas provide clear, dark skies. Renting a car gives flexibility to chase aurora away from clouds, particularly along the Thingvellir National Park corridor.
North Coast Excursion
For more dramatic landscapes and darker skies, driving north toward Akureyri or Húsavík significantly improves aurora visibility. Coastal fjords, volcanic mountains, and frozen lakes create excellent foregrounds for photography. Key spots include:
Lake Mývatn: Still waters reflect aurora well, especially during partial moonlight.
Dimmuborgir Lava Fields: Jagged volcanic formations offer striking silhouettes against the night sky.
Húsavík Harbor: Ideal for combining aurora viewing with northern whale watching during early winter evenings.
Photography & Viewing Tips
Aurora can appear surprisingly close to the horizon in Iceland due to low latitude. Include mountains or water for scale.
Wide-angle lenses (14–24mm) and sturdy tripods are essential; coastal winds can be strong.
Bring spare batteries and memory cards; cold drains power rapidly, and remote locations may lack stores.
Monitor real-time aurora forecasts (NOAA SWPC and University of Alaska Fairbanks) and local cloud maps to identify open-sky pockets.
Where to Stay
Lake Mývatn Nature Baths Lodges: Heated cabins with panoramic windows facing the lake; ideal for observing aurora from indoors.
Húsavík Guesthouses: Simple, warm, and close to dark-sky locations; combine convenience with access to northern lights photography.
Remote Airbnbs along Ring Road: Offer maximum darkness and flexibility to chase aurora without city interference.
Budget Snapshot (Iceland, 7 Days)
Vehicle rental (7 days): ~$900–$1,300
Accommodation: ~$2,000–$3,500
Fuel: ~$400
Meals & incidentals: ~$500–$700
Total approximate: $3,800–$5,900
Staying Warm While Chasing the Aurora
At temperatures below –30°C, warmth depends on managing heat loss effectively. Key strategies focus on clothing, layering, and moisture control.
- Three-Layer Clothing System
Base layer: Merino wool, 250 GSM or heavier. Avoid cotton—once wet, it loses heat rapidly and dries slowly.
Mid layer: High-fill down or thick fleece. Traps air and provides the main insulation, especially when standing still.
Outer shell: Fully windproof. Blocks Arctic winds that can penetrate lesser fabrics. Insulation is secondary to wind protection at extreme cold.
- Footwear Strategy
Sock layering: Thin liner sock → plastic vapor barrier (even a bread bag works) → thick wool sock. Prevents sweat from reaching outer layer and freezing.
Boot fit: One full size larger than normal. Tight boots restrict circulation, reducing warmth regardless of insulation quality.
- General Tips
Avoid direct contact with cold surfaces; use insulated pads when sitting or kneeling.
Minimize exposure to wind; use hoods, neck gaiters, and gloves effectively.
Keep moving in short bursts if standing still for hours to maintain circulation.
Carry spare socks and hand warmers; moisture and wind can deplete body heat faster than air temperature alone.
Photographing Fast Aurora During High Activity
When aurora moves quickly, standard long-exposure techniques often blur the details. Use these steps to capture sharp structure and dynamic movement:
1. Camera Settings
Shutter speed: Shorten to 1–5 seconds (depending on brightness and speed).
Aperture: Open wide (f/2.8 or lower if possible) to let in more light.
ISO: Increase as needed (800–3200) to maintain exposure without blur. Modern cameras handle noise better than older models.
2. Focus
Manual focus only: Autofocus struggles in low-contrast skies.
Set to infinity: Adjust carefully during daylight or twilight.
Lock the focus ring: Use tape or a clip to prevent accidental movement with gloves on.
3. Composition & Stability
Use a sturdy tripod rated for wind; fast aurora amplifies any shake.
Include foregrounds like mountains, fjords, or water for context and reflection effects.
Check histogram after a few shots; adjust ISO/aperture/shutter to avoid overexposed green patches.
Tips:
Take multiple short exposures rather than one long exposure; stack later in post-processing if desired.
Keep spare batteries warm in inner pockets; cold drains them quickly.
Experiment with angles: aurora moving overhead may require vertical framing to capture ribbons and folds.
Batteries, Electronics, and Cold Reality
Cold drains batteries fast. At around –25°C, lithium-ion batteries can lose more than half their usable capacity.
One practical workaround is external power. Many current mirrorless cameras accept USB-C power delivery. A high-capacity power bank kept inside your jacket, warmed by body heat, can keep a camera running for an entire night if connected with a long cable.
Condensation is the other silent killer. When moving from extreme cold into a warm car or room, seal your camera in a plastic bag first and let it warm gradually. Moist air condensing inside electronics can cause long-term damage that won’t show up immediately.
Reading the Right Data in Real Time
Percentage-based aurora apps are fine for casual use, but serious planning relies on raw data.
The NOAA Space Weather dashboard remains the primary source. Watching ground magnetometer graphs is especially useful. Sudden drops often mean a geomagnetic substorm is already underway.
The University of Alaska Fairbanks aurora forecast provides clearer visibility boundaries than most global maps. It’s particularly helpful for understanding how far south aurora might realistically be seen during stronger events.
For weather, broad forecasts are rarely enough. Tools that show cloud layers separately are far more useful. Even a small break in low-level clouds can be enough for dramatic, framed aurora shots.
Timing: Why the Equinox Still Matters
Even in strong aurora years, timing significantly affects viewing quality. Around the equinoxes, Earth’s magnetic orientation allows solar particles to enter the magnetosphere more efficiently, increasing aurora intensity and frequency.
March: Offers a strong balance—long, dark nights, slowly stabilizing weather, and frequent geomagnetic storms.
Early autumn (September–October): Open water before lakes freeze creates striking reflections, doubling the visual impact of bright displays.
Safety, Crowds, and Common Mistakes
Icy roads: The biggest hazard in aurora regions. Vehicles can slip even on lightly snow-covered roads. Check local road conditions, carry tire chains if allowed, and plan your route before nightfall.
Wind exposure: Coastal locations can experience sudden gusts strong enough to destabilize tripods or small vehicles. Anchor tripods and wear appropriate layers.
Lighting etiquette: Always use red lights. White headlamps destroy night vision and ruin long-exposure photography for nearby observers.
Drones: Battery life drops sharply in cold weather; sudden failures can occur. Respect local regulations and wildlife restrictions. Carry spare batteries in insulated pockets if flying is allowed.
A Few Field-Tested Insights
Magnetic field monitoring: When the magnetic field points north, even strong storms may appear weak. Be patient—sometimes the best move is to rest and wait for conditions to change.
Moon phase considerations: Bright aurora can dominate moonlight, but partial moon phases are useful for illuminating foregrounds without washing out the sky. Full moon nights can still produce excellent photos if aurora activity is strong.
Navigation backup: GPS signals may degrade during major solar events. Always carry offline maps or physical paper maps in remote areas.
Micro-climate scouting: Clouds and fog can be very localized. Drive 10–20 km to check alternative vantage points if skies are blocked at your base location.
Layering for flexibility: Keep an extra warm layer, gloves, and insulated boots in your vehicle. Quick adjustments can make hours-long observations comfortable.
Aurora alerts: Set push notifications for sudden geomagnetic activity from reliable apps or NOAA feeds. Quick reaction can turn an ordinary night into a spectacular display.
Photo prep: Keep cameras and tripods ready outside of heated shelters. Cold gear can take 5–10 minutes to stabilize; you don’t want to miss a sudden surge.
Equinox periods maximize aurora chances, but safety, weather, and preparation make the difference between a memorable night and a frustrating one. With careful planning, you can turn even marginal nights into rewarding aurora experiences.
Latest News

USA Road Trip Routes: Bucket List Ideas For 2026
February 26, 2026
All-Inclusive Vacation Packages Under $1,000 That Are Worth Every Cent
February 17, 2026
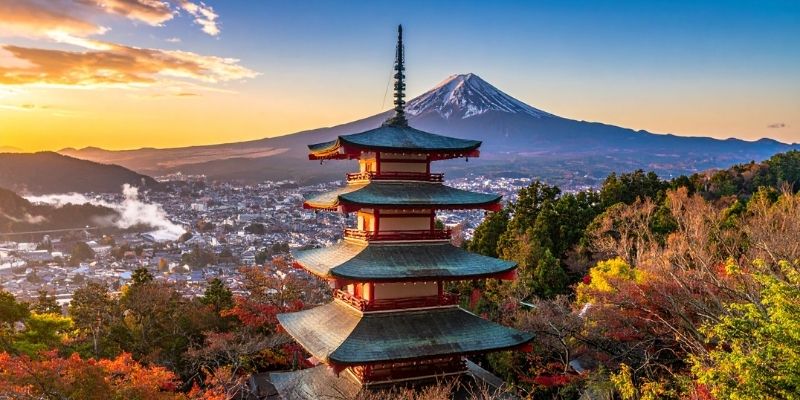
How to Travel Overnight in Japan for Under $300 (Trains, Buses & More)
February 16, 2026

5 Secrets to Booking Flights for Half the Price
November 8, 2025

Uzbekistan Cuisine Decoded: What To Eat On Your First Visit
October 27, 2025
The World’s Most Beautiful Beaches That Are Actually Real
September 21, 2025